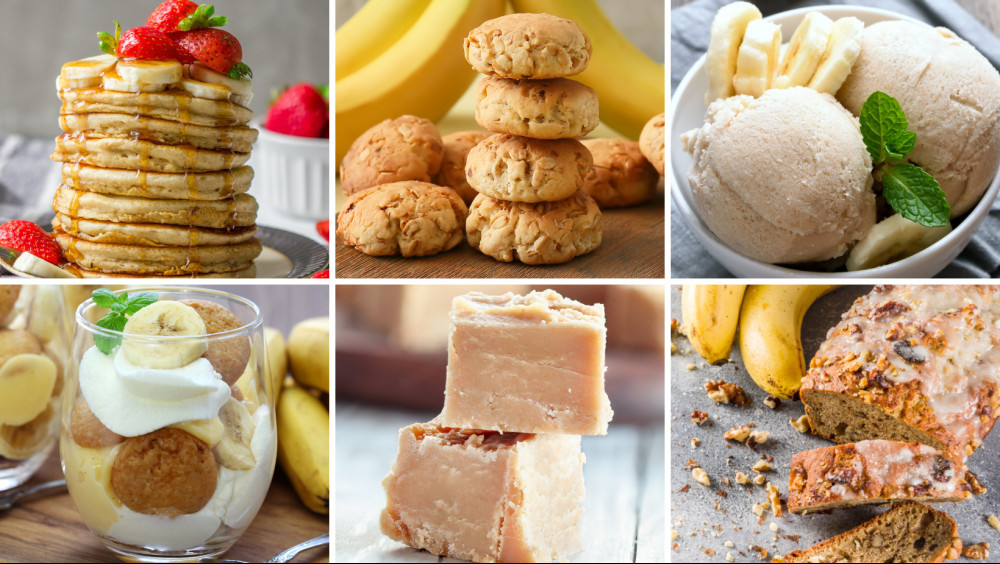
7 Best Vegan Banana Recipes For Your Kids
7 Best Vegan Banana Recipes For Your Kids
Don't throw out those spotted fruits you've been avoiding for weeks, and make some simple desserts for your kids.
It is to prepare these sweet vegan recipes with your ripe bananas. So let’s try these vegan banana recipes.

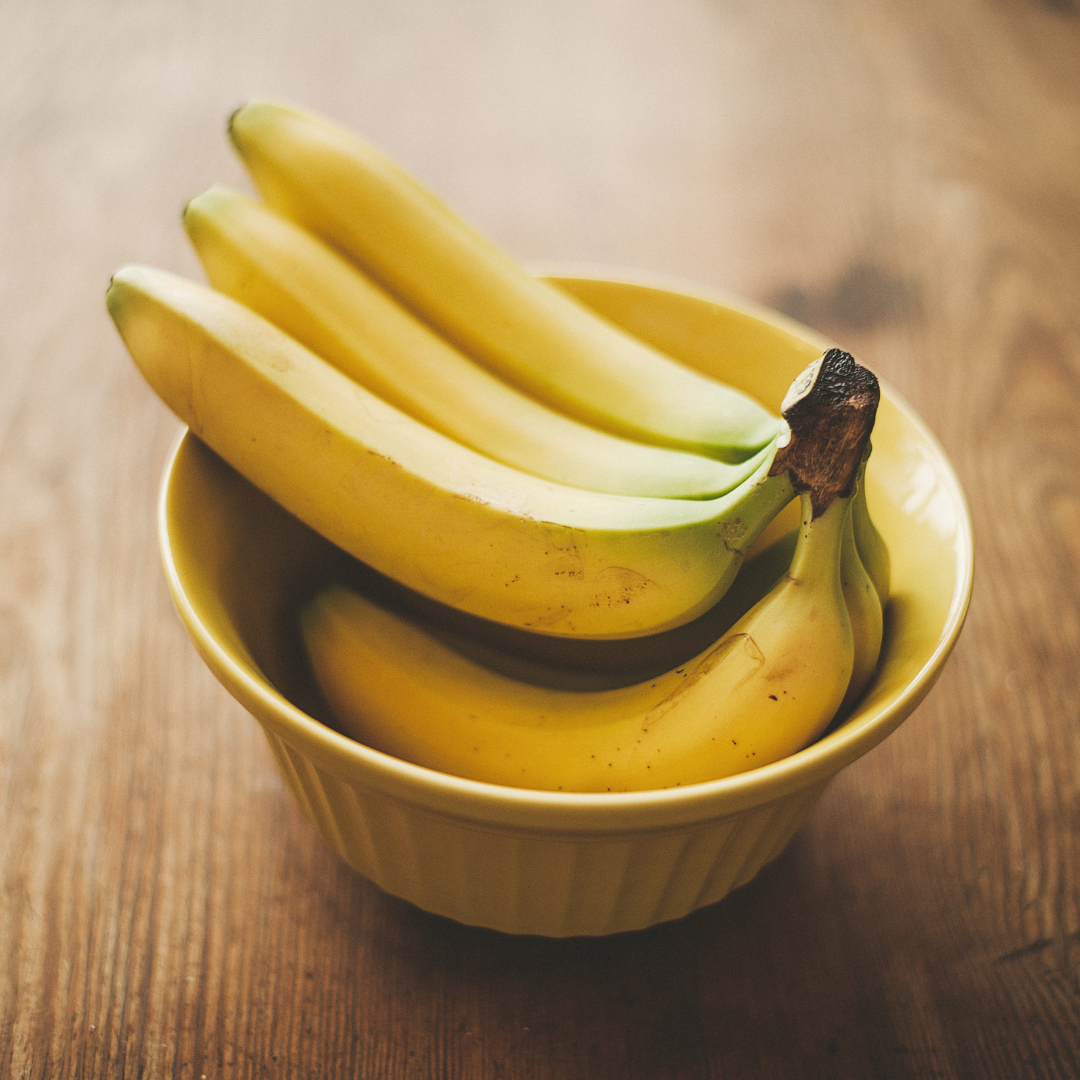
Choosing The Best Bananas For Recipes
When the bananas are precisely in the middle of the ripening spectrum, that is the best colour stage to purchase them at.
The ideal shade is primarily yellow, with a touch of green. You might want to choose bananas depending on when you'll use them and how you plan to eat or use them.
Select some already ripe (yellow with brown spots) for immediate use. To use later, choose bananas that are still green but not too much. Avoid bananas with bruises, and look for ones that are full, plump, and have a bright colour.
Typically, bruised fruit has depressed, moist, and dark areas on the skin. A dull, gray hue suggests they were either overheated or overcooled during storage.
The green skin is not visible on ripe bananas. It is not yet ripe if you can't easily break the stem off the banana to peel it.
If the fruit's skin is difficult to separate from the fruit, it is probably too bitter and starchy to eat raw, and it may also make you feel constipated. The ripest bananas start to get little dark specks on them. Sugar specks are what these specks are called.
Vegan Banana Recipes

1. Vegan Banana Fudge
Overripe bananas and coconut oil are combined to make banana fudge which is smooth and creamy. This simple fudge recipe only calls for two ingredients and has no added sugar or dairy.
Prep time: 5 minutes | Cook time: 25 minutes | Total time: 30 minutes | Serving: 15
Ingredients
- Ripe bananas: 6
- Coconut oil: 3 tablespoons
Optional:
- Crushed nuts for garnish. I used slivered almonds
- Ground cardamom, add it with the bananas or sprinkle on top of the fudge.
Method
- Blend the bananas until smooth. In a non-stick saute pan over medium heat, melt 1 tablespoon of coconut oil and add the banana puree.
- About 20 minutes of constant stirring.
- Add the remaining tablespoon of coconut oil and stir for 10 minutes until the banana mixture turns black and sticky.
- Add the first tablespoon of coconut oil and whisk until thoroughly blended. Place the banana mixture in the refrigerator to chill after spooning it onto a greased plate or into a loaf pan lined with parchment paper.
- When serving, slice the fudge while it's still cold and let it warm up. Now let’s enjoy.

2. Vegan Banana Peanut Butter Ice Cream
Bananas with brown spots were glaring me down from our counter. I tried to ignore them, but they didn't go away. I feel as though I can never consume bananas quickly enough. They always deteriorate and ask me to utilize them. I frequently make smoothies, banana bread, banana cookies, and banana cake.
Prep time: 2 hours | Cook time: 0 minutes | Total time: 2 hours | Servings: 4
Ingredients
- Ripe bananas: 4
- Peanut butter: 2 tablespoons
Method
- Bananas are peeled and cut into ½-inch discs. Place the banana slices in a single layer on a sizable platter or baking sheet. Frozen for a few hours.
- Sliced bananas should be placed in a food processor or strong blender. Slices of banana should be pureed, scraping the bowl as necessary.
- Purée the mixture until it's smooth and creamy. Blend in the peanut butter after adding it. For soft-serve ice cream consistency, serve right away. Place the ice cream in the freezer for a few hours if you desire a firmer texture before eating.
- Note: If you're having trouble getting a creamy texture, add 1-2 tablespoons of plant-based milk to the banana slices to help purée them. Use a strong food processor or blender, please! All kids love the vegan banana peanut butter ice cream very much.

3. Vegan Banana Pudding
A completely handcrafted, vegan banana pudding from the South! It's too simple not to make this gluten-free, allergy-free, and sugar-free version of the traditional dessert! Layers of vanilla wafers, banana slices, vanilla pudding, and delicious creamy fluff in a no-bake recipe!
Prep time: 10 minutes | Cook time: 10 minutes | Total time: 20 minutes | Servings: 6-8
Ingredients
- Homemade gluten-free vanilla wafers: 1 batch
- Large ripe bananas: 3 to 4
- Homemade vegan fluff: 1 batch
Ingredients For The Vegan Vanilla Pudding
- Unsweetened coconut milk: 3 cups
- Granulated erythritol: ½ cup
- Corn starch: 4 tablespoons
- Pure Madagascar bourbon vanilla extract: 1½ to 2 teaspoons
Method
- In a sizable saucepot over the fire, combine the non-dairy milk, sugar, starch, and vanilla to make the vanilla pudding.
- Over medium-high heat, bring the pot to a boil while stirring thoroughly to remove any remaining starch lumps.
- For ten minutes, lower the heat to medium-low while stirring constantly.
- The pudding should have thickened by this point. You may turn off the heat, let it cool to room temperature, and then transfer it to the refrigerator to continue thickening as it cools.
- Putting together the vegan banana pudding. Place a single layer of vanilla wafers, a layer of banana slices, and then enough of the chilled vanilla pudding to cover everything in the serving dish.
- One more time—or as many times as you can—repeat this stacking.
- Finishing touches for the banana pudding include homemade fluff (or whipped topping), crushed cookies, and banana slices.
- Before serving, place in the fridge for at least 2-4 hours.

4. Vegan Banana Cake
Easy to create, fluffy, luscious banana cake packed with smooth, creamy peanut butter and chocolate buttercream is vegan banana cake with chocolate peanut butter icing. The ideal dessert for every celebration!
Prep time: 15 minutes | Cook time: 30 minutes | Total time: 45 minutes | Servings: 12
Ingredients For The Cake
- Plain (all-purpose) flour sifted: 285 g
- Bicarbonate of soda: 1½ teaspoon
- Ground cinnamon: 1 teaspoon
- Salt: ¼ teaspoon
- Very ripe mashed bananas: 3 medium
- Light brown soft sugar: 1 cup + 1 tablespoon
- Sunflower oil: 135 ml
- Unsweetened plant milk: 90 ml
- White wine vinegar: 1½ teaspoon
- Vanilla extract: 1 teaspoon
Ingredients For The Buttercream
- Dark chocolate chopped (70% cocoa solids) : 100 g
- Dairy-free margarine: 75 g
- Vegetable shortening: 75 g
- Icing (powdered) sugar sifted: 300 g
- Cocoa powder sifted: 1 tablespoon
- Creamy peanut butter: 75 g
- Vanilla extract: 1 teaspoon
- Pinch salt
- A drop of non-dairy milk if needed
Method
- Oven: Preheat to 180°C/350°F/gas mark 4. Cake pans should be greased, and the bases should be lined with parchment paper.
- On a low speed, stir the flour, baking soda, cinnamon, and salt together until thoroughly combined.
- Banana purée, light brown soft sugar, sunflower oil, plant milk, white wine vinegar, and vanilla extract are all combined in a bowl.
- Mix on low speed until just combined after adding the wet ingredients to the dry ingredients. Avoid over-mixing to avoid the cake becoming tough.
- A skewer inserted into the center of the cakes should come out clean after 25 to 30 minutes of baking after evenly dividing the batter between the muffin tins.
- After allowing the cakes to cool in their pans for ten minutes, carefully remove them and let them finish cooling on a wire rack.
- Melt the chocolate in a bowl set over a pot of gently simmering water or in brief bursts in the microwave, frequently stirring, to make the buttercream. Set aside to allow a little cooling.
- Margarine and vegetable shortening should be combined in a stand mixer bowl and blended thoroughly. When everything is combined, add the icing sugar that has been sieved. Increase the mixer's speed and whisk for a few minutes until fluffy.
- Peanut butter, vanilla extract, salt, and melted chocolate are all whisked in after the cocoa powder. You can whisk in a drop of soy milk if it becomes too thick.
- The once-cooled cake should be placed on a serving platter or cake stand with buttercream. Put the second cake layer on top, then frost the cake's top and sides with buttercream.
- If desired, garnish with chocolate curls and banana chips. Up to 5 days of storage in an airtight container at a cool room temperature.

5. Vegan Banana Cookies
These banana cookies without sugar are incredible. They are vegan and oil-free and can be made with only 4 simple ingredients. The fluffiest and lightest cookies ever!
Prep time: 10 minutes | Cook time: 15 minutes | Total time: 25 minutes | Servings: 13 cookies
Ingredients
- Ripe bananas: 2
- Almond milk: 1/3 cup
- All-purpose flour: 1 cup
- Baking powder: ½ teaspoon
Method
- Set the oven's temperature to 350°F. Bananas should be peeled and mashed in a mixing basin. Stir in the almond milk after adding it.
- When it becomes a thick mixture, add the flour and baking powder and stir to blend.
- Use an ice cream scoop to drop roughly 13 evenly-sized batter blobs onto a baking sheet covered with parchment paper.
- The cookies should be baked in the oven for 10 to 15 minutes (until slightly brown on the edges).
- Allow them to chill off and delight in!

6. Vegan Banana Bread With Walnuts
There is no better vegan banana bread than this one! This traditional dish only needs a few essential ingredients to come together! Replace the walnuts with one of the many add-in alternatives below for a nut-free loaf!
Prep time: 15 minutes | Cook time: 30 minutes | Total time: 45 minutes | Servings: 3 mini loaves
Ingredients
- Ripe bananas: 4
- All-purpose flour: 1 and ½ cups
- Coconut sugar: 1/3 cup
- Refined coconut oil: ¼ cup
- Walnut pieces chopped: 3 tablespoons
- Baking powder: 1½ teaspoons
- Baking soda: ½ teaspoon
- Nutmeg: 1 pinch
- Himalayan pink salt: 1 pinch
Method
- Set the oven to 350°F to begin. Next, chop the walnuts and grease (or line them with parchment paper) in the loaf pan.
- The flour, baking powder, baking soda, nutmeg, and salt should be combined and set aside in a medium bowl.
- Mash the bananas in a different bowl. Make sure there are no significant portions left. But small pieces are acceptable.
- The bananas should be evenly blended with the sugar and oil after being added.
- Add enough dry ingredients to bring everything together once the oil and sugar have been combined. Add your walnut pieces or other mix-ins now, folding gently.
- Fill the loaf pan with the prepared batter. For smaller loaves, bake the banana bread at 350°F for 30–40 minutes. Or 50 to 60 minutes for a standard 8×4-inch loaf.
- Use a toothpick to check the doneness of the bread. The bread will be ready when it comes out clean. Bake the banana bread for five minutes if it's still too moist.

7. Vegan Oat Flour Pancakes With Bananas
These vegan oat flour pancakes are the perfect healthy breakfast. They are made with ripe bananas. They are cheap and easy to make, and plant-based!
Prep time: 5 minutes | Cook time: 20 minutes | Total time: 25 minutes | Servings: 2
Ingredients
- Oat flour: 2 cups
- Plant milk: 2 cups
- Ripe bananas: 2
- Baking soda: 2 teaspoons
Ingredients For The Toppings
- Maple syrup: 4 tablespoon
- Berries: ½ cup
Method
- Bananas, plant milk, and oat flour (or oats) should all be added to a blender and blended for 30 seconds. Blend for a further 10 seconds after adding the baking soda.
- Give the pancake batter 10 minutes to rest. In the interim, warm a little oil in a pan over medium to low heat.
- The pancakes should be golden brown on both sides. Add some berries and your preferred sweetener as garnish. Now let’s enjoy.
How To Store Bananas
1. Choose Bananas Based on How Ripe They Are
You may want them to be more or less ripe depending on when you want to use them and how you want to store them. If you're only buying for yourself, you might prefer greener bananas so that they don't all ripen at once. Ripe bananas are the best option if you're buying them for a large family or a small group of people who will consume them quickly. The following considerations should be made when selecting bananas:
- Green bananas are still unripe. For the longest storage life without freezing, buy green bananas. Pick fruit that is firm and free of blemishes or dark spots on the peel.
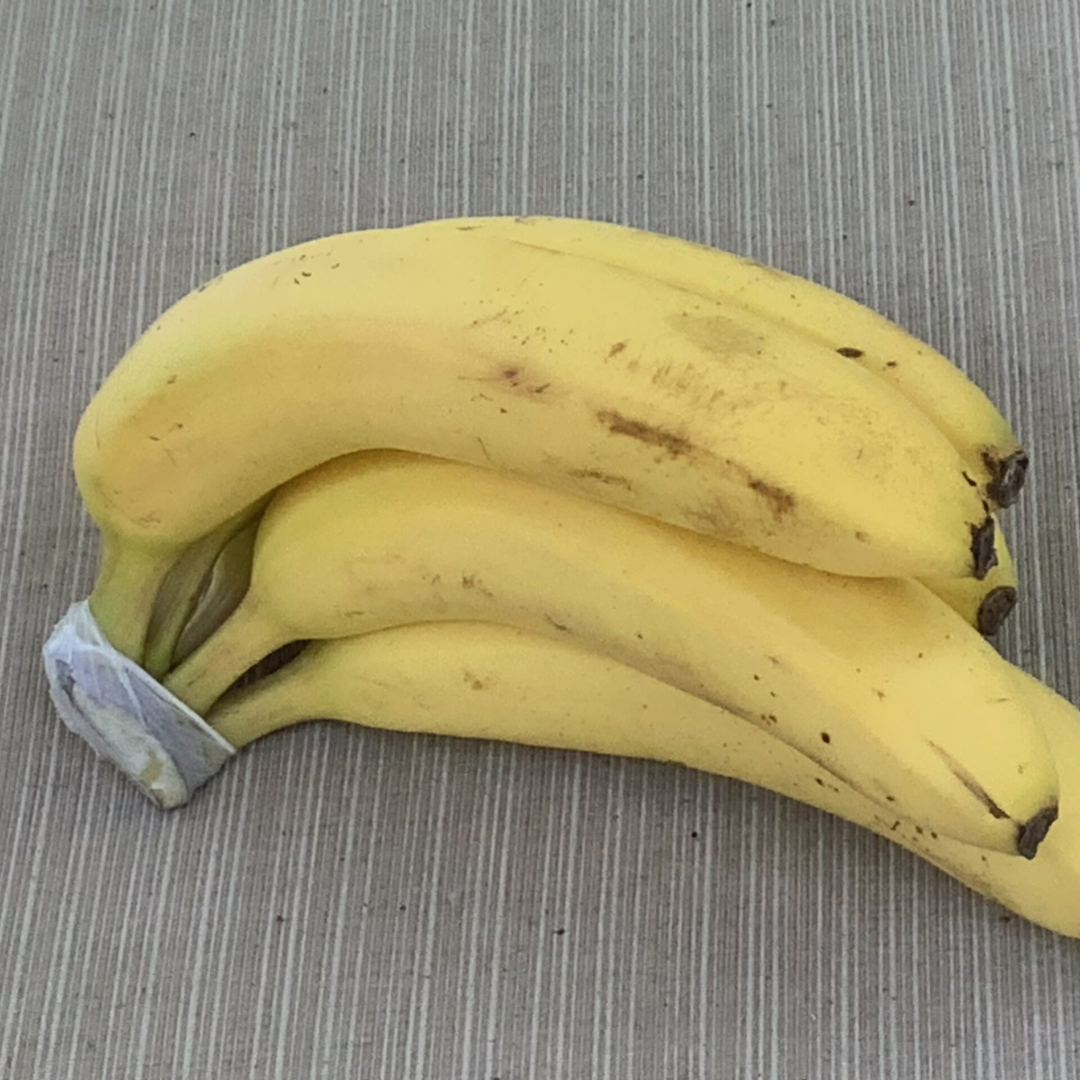
- Ripe bananas have acquired their adult hue. When ripe, most bananas are yellow, but some varieties are brown or red. The banana is riper when the adult colour of the fruit shows more on the peel.
- The sweetest bananas are those with brown spots. The fruit inside ripens even more as the tiny brown spots on the peel get bigger. Fruit is overripe when the peel is more brown or black than yellow.
- Avoid bananas that appear dull and have a gray tint. This indicates that the bananas were chilled, which prevents them from ripening properly.
2. Green Bananas Must Be Kept At Room Temperature
Bananas cannot properly ripen even after being returned to room temperature if they are refrigerated or frozen before they ripen.
- Green bananas should be placed in a brown paper bag to hasten the ripening process. Add an apple or a tomato to the bag if you want the bananas to ripen in less than a day.
- Placing the bananas in a bowl with other ripe fruit, such as other ripe bananas can also help the fruit ripen faster.
3. Remove Bananas From Plastic Bags Immediately
Never keep bananas in plastic bags as they retain too much moisture and risk turning the fruit bad.
4. Leave Ripening Yellow-Green Bananas At Room Temperature
Although the bananas will indeed ripen more quickly in a warm environment, you should keep them out of direct sunlight.
5. Bananas Should Be Hung From a Banana Tree
A banana tree is a wise investment if you're a true fan of the fruit. You can buy banana hangers that you can mount on the wall as well as free-standing banana trees that you can set on your countertop. Air can move freely around banana trees and hangers, preventing “resting bruises” on the fruit.
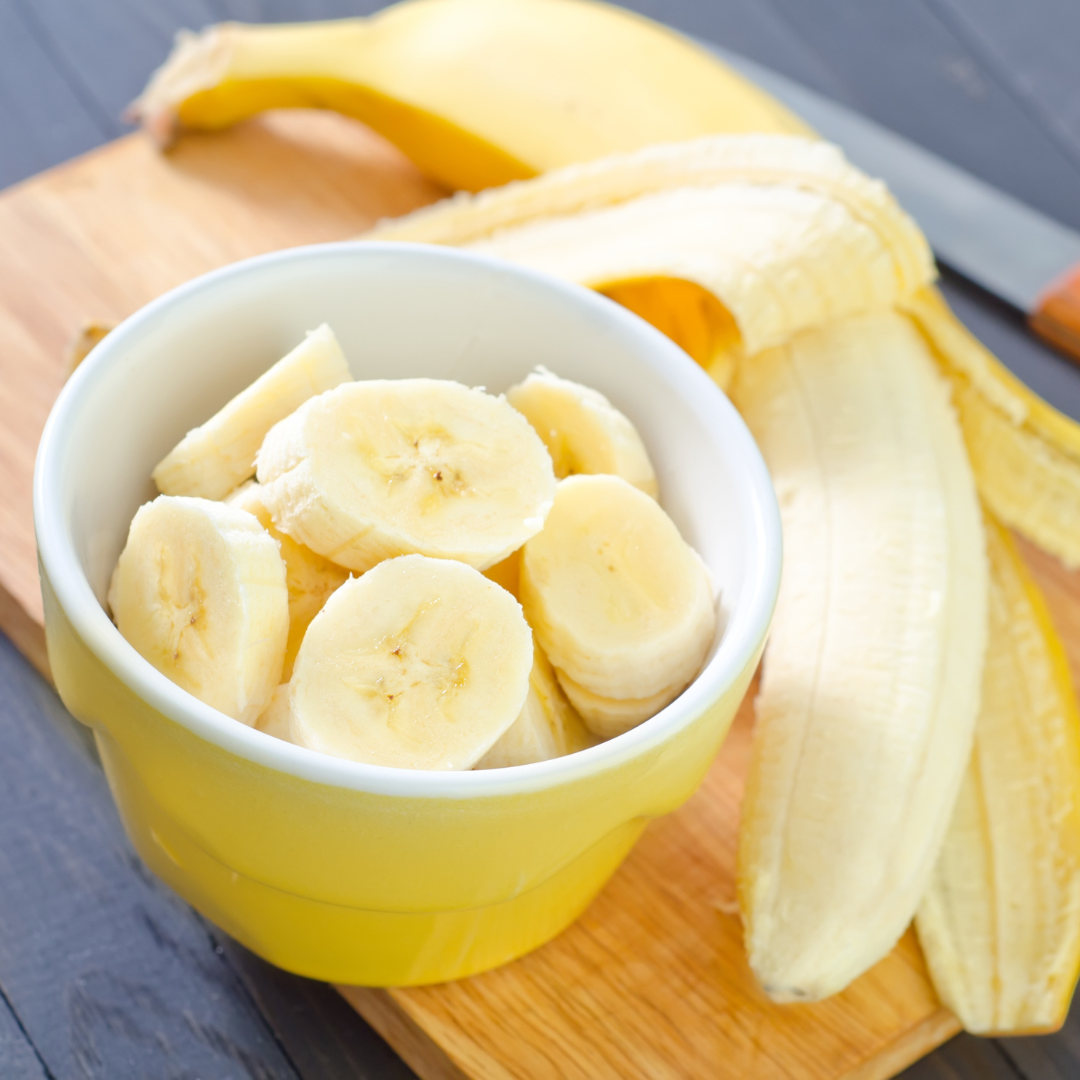
6. Freshen Sliced Bananas
Sliced bananas should be covered in a little lemon juice, pineapple juice, or vinegar to keep them fresher for longer, whether you're storing them in the fridge or using them to make a delicious fruit salad.
7. Kept For Several Months In The Freezer
Frozen bananas can be defrosted and used in smoothies, baking, and cooking. You can also drizzle them with a tiny bit of lemon juice to prevent them from turning brown.
- Bananas should be peeled, then mashed or chopped before freezing.
- The banana should be divided into the portions required for a recipe.
- Bananas should be divided into portions before being placed in plastic containers or zippered freezer bags.
8. Before Freezing Bananas, Peel Them
As many as will fit should be placed in a freezer-safe zipper bag or container. Reminder: If frozen, frozen bananas are impossible to peel. When they defrost, they become a sticky mess. Blenders can be made with frozen, peeled bananas.
9. Place Completly Ripe Banana in Refrigerator's Produce Drawer
Refrigeration significantly slowed but did not stop the ripening process. The fruit will remain firm and fresh for one to two weeks while the peel turns brown.
Dole Bananas claims that even though ripe banana peels may turn black, keeping them in the refrigerator will prolong the enjoyment of their sweet flavour.
10. Banana Stems Should Be Wrapped In Plastic Wrap
Place an unripe pear or avocado next to some bananas, and it will hasten its ripening while slowing down the ripening of the bananas.
A win-win scenario exists! By doing this, ethylene gas, naturally produced during the ripening process, won't get to other parts of the fruit and cause it to ripen too quickly.
The tape can be applied to the plastic wrap for even more security. Carefully rewrap each banana you take out of the bunch.
Alternatively, you can remove the bananas from the bunch and individually wrap each stem. Although it requires some care, it is worthwhile!
Conclusion
The healthiest, most practical, tastiest, and least expensive fresh fruit you can purchase is the banana.
They are, therefore, a fantastic option for anyone who wants to eat healthily. So don’t miss trying these vegan banana recipes. I hope your kids will love them all very much.
An alternative theory exists. Take one out and leave the rest in the bag to test whether the bananas will stay fresher longer inside.
If the one removed ripens more quickly, the bag might be capable of keeping things fresh. But this might depend on how hot and humid the space is where you're keeping the bananas.
I trust you enjoyed this article about the 7 Best Vegan Banana Recipes For Your Kids. Please stay tuned for more blog posts to come shortly. Take care!
JeannetteZ
>>>Want To Learn How To Create Delicious, Cruelty-Free, Healthy AND 100% Vegan Meals? Try These Awesome Vegan Cooking Courses With A Free 7-DAY MEMBERSHIP<<<
Your Opinion Is Important To Me
Ideas? Thoughts? Questions? I would love to hear from you. Please leave me your questions, experiences, and remarks about this article on the 7 Best Vegan Banana Recipes For Your Kids in the comments section below. You can also reach me by email at Jeannette@LivingTheVeganLifestyle.org.
Disclosure
This post may contain affiliate links. I earn from qualifying purchases as an Amazon Associate and other affiliate programs. Read my full disclosure.
Here are links to some of my favourite articles:
7 Healthy Vegan Cucumber Recipes For Your Kids
7 Delicious Vegan Carrot Recipes For Your Kids
7 Delicious Vegan Broccoli Recipes For Your Kids
7 Healthy Vegan Kale Recipes For Your Kids
8 Delicious Vegan Celery Recipes For Your Kids