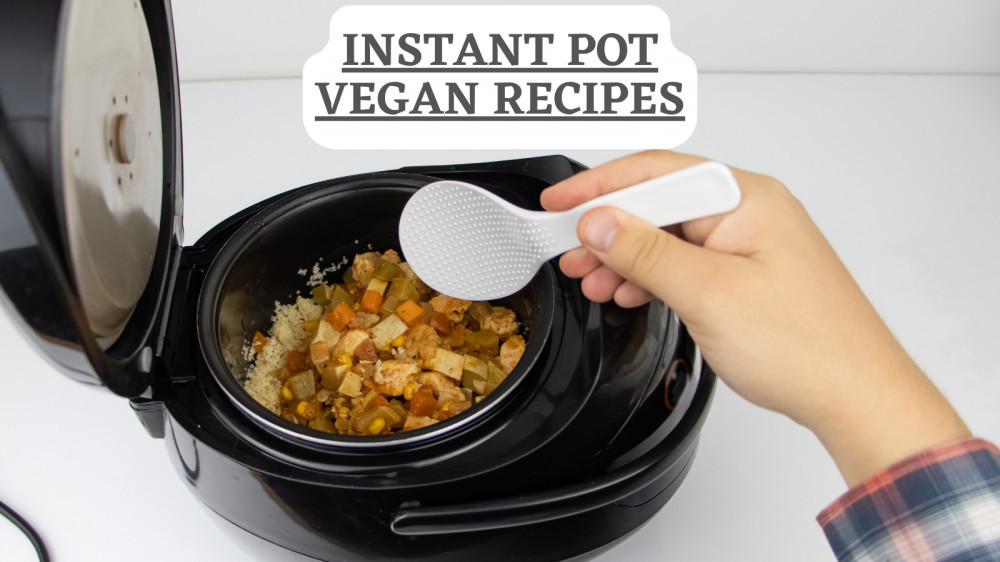
5 Delicious Instant Pot Vegan Recipes
Instant Pot vegan recipes make plant-based cooking easier, faster, and more convenient. Whether you’re preparing a hearty dinner, a comforting soup, or even a simple dessert, the Instant Pot can help you create delicious meals with minimal effort.
One of the best things about using an Instant Pot is how much time it can save in the kitchen while still delivering rich flavours and nourishing meals. It’s perfect for busy days when you want something wholesome without spending hours cooking.
Whether you’re new to using an Instant Pot or simply looking for fresh meal ideas, these Instant Pot vegan recipes offer something delicious to try. From comforting favourites to satisfying everyday meals, there’s a recipe here for every occasion.
What Is An Instant Pot?
An Instant Pot is a versatile multicooker that can perform several cooking functions in one appliance. Depending on the model, it can pressure-cook, slow-cook, steam, sauté, warm food, and even cook rice and soups.
Originally introduced in 2010, the Instant Pot quickly became popular for making home cooking faster and more convenient. Today, various sizes and models are available, making it easy to choose one that suits your kitchen and cooking needs.
Many people enjoy using Instant Pots because they simplify meal preparation and can help create flavourful meals with less hands-on cooking time. Popular models such as the Instant Pot Duo have remained favourites for their versatility and ease of use.
Will Nutrients Be Lost During Cooking?
While some people associate high-pressure cooking temperatures with nutrient loss, this is untrue. Because pressure cooking distributes heat evenly and rapidly, you don't need to immerse things like frozen veggies in water.
You only need a small amount of water to generate enough steam; most recipes call for approximately a cup of liquid.
Because the meal is not soaked in water, vitamins are not dissolved and are instead maintained for consumption. Furthermore, the steam surrounding the meal will keep it from oxidizing due to air exposure.
You'll note that your green vegetables will come out of the Instant Pot looking precisely the same as when they went in and preserving their natural flavours.
Which Instant Pot Size Should I Get?
All major Instant Pot models are available in three sizes: 3-quart, 6-quart, and 8-quart. The 6-quart size is unquestionably the most popular and ample for most needs.
Most folks should get a 6-quart pot because most Instant Pot recipes you'll find online and in cookbooks were tested in 6-quart pots.
This eliminates the need for conversions. While making a recipe in the 8-quart Instant Pot, you must add more liquid. Recipes must be halved for a 3-quart model.
If you're a first-time customer, I recommend only choosing the 3-quart size if you have a small kitchen or live in a dorm. If you frequently cook for a larger family, the 8-quart may be better.
One final point. Newer variants, such as the Duo Nova (more on that below), are available in a larger size: 10 quarts—for all your extended family's needs!
Want to Share Your Passion for Vegan Living?
Sharing my passion for vegan living — from recipes and travel to mindful living — has been such a rewarding journey.
If you’ve ever dreamed of creating a blog or website around
something you truly care about, this guide may inspire your first step.
🌱 Read: How To Start A Vegan Blog
Curious how I started? Read my story:
How Wealthy Affiliate Helped Me Build My Vegan Blog
5 Delicious Instant Pot Vegan Recipes
Now, let’s explore some delicious Instant Pot vegan recipes that make plant-based cooking both convenient and satisfying. From comforting meals to flavourful dishes, these recipes are simple to prepare and perfect for busy days when you want something nourishing without spending hours in the kitchen.
1. Instant Pot Vegan Potato Leek Soup Recipe
This Instant Pot vegan potato leek soup is rich, creamy, and filling. It's ideal for weeknight dinners and will be ready in no time!
Prep time: 20 minutes | Cook time: 6 minutes | Total time: 26 minutes | Servings: 5 people
Ingredients
- Grapeseed oil or preferred oil: 2 tablespoons
- Onion: 1 small, diced
- Leeks: 3 medium, cleaned well & sliced
- Garlic: 3-4 cloves, minced
- Dried thyme: ¾ teaspoon
- Dried rosemary: ½ teaspoon
- Ground coriander: ½ teaspoon
- Russet potatoes: 5 small (2 lbs), peeled and chopped
- Vegetable broth: 4 cups, low sodium
- Bay leaves: 2
- Sea salt: 1 teaspoon or more to taste
- Fresh ground pepper to taste
- Canned coconut milk: 1 cup, shaken well
Method
- Add the oil to the sauté function of your Instant Pot. Once the pan is hot, add the leeks and onions. Sauté for 4-6 minutes or until softened. Combine the garlic, thyme, rosemary, and coriander in a large mixing bowl.
- Sauté for 30-60 seconds or until aromatic. Remove the sauté function from the equation. Add the potatoes, vegetable broth, bay leaf, salt, and pepper. Close the lid and secure it. The steam release handle should be in the Sealing position. Set the Pressure Cooker (Manual Setting) to high pressure and use the + or – buttons to set the time to 6 minutes. When the time is up, the cooker will beep. Carefully turn the steam release handle to the Venting position (it will spurt out a lot of steam and some water). Once the Float Valve has been depressed, the lid can be opened.
- After removing the bay leaves, pour the coconut milk (shake the can first). Mix using an immersion blender (or a regular blender) until creamy and smooth. Season to taste and add more if necessary. If the soup is too thick, dilute it with a small amount of vegetable broth.
- Serve this delicious Instant Pot vegan potato leek soup on a cold winter night.

2. Chinese Instant Pot Vegan Takeout-Style Tofu And Broccoli Recipe
This is a Chinese Instant Pot vegan takeout-style tofu and broccoli recipe. It is a sticky, spicy, and slightly sweet tofu and broccoli meal that is like Chinese takeout, but it's done at home and in the Instant Pot!
Prep time: 20 minutes | Cook time: 30 minutes | Total time: 50 minutes | Serving size: 4
Ingredients For The Marinated Tofu
- Extra-firm tofu: 1 14-oz block
- Reduced-sodium tamari or soy sauce: 3 tablespoons
- Sriracha or similar chilli-garlic sauce: 2 teaspoons
- Toasted sesame oil: 1 teaspoon
- Rice vinegar: 2 teaspoons
Ingredients For The Ginger-Chilli Sauce
- Reduced-sodium tamari or soy sauce: ¼ cup
- Agave nectar or coconut nectar: ¼ cup
- Water: 2 tablespoons
- Sriracha or similar chilli-garlic sauce: 1½ tablespoons
- Toasted sesame oil: 1 tablespoon
- Rice vinegar: 1 tablespoon
- Ginger,: 1½-inch piece(grated or minced)
Ingredients For Finishing
- Grapeseed oil or other neutral, high-heat cooking oil: 1½ tablespoons
- Broccoli: 4 cups, cut into florets
- Cornstarch: 2 tablespoons
- White rice or brown rice for serving
Method
- Drain the tofu and cut it into four slabs to marinate. Place the tofu on a chopping board lined with paper towels. More paper towels should be placed on top of the tofu, weighted down with a few heavy cookbooks or a heavy skillet loaded with a few cans of beans.
- Allow it to sit for at least 30 minutes, preferably an hour, changing the paper towels every 30 minutes to ensure all the moisture is drained. Tofu should be cut into 34-inch pieces.
- Toss the tofu with the tamari, Sriracha, sesame oil, and vinegar in a gallon-size zip-top bag. Toss to mix, then set aside for 5 minutes, kneading the tofu occasionally.
Method To Make The Ginger-Chilli Sauce
- Whisk together the tamari, agave nectar, water, Sriracha, sesame oil, vinegar, and ginger in a medium mixing bowl until well blended.
- Finish the meal by turning the Instant Pot to the Sauté setting and letting it heat up for a few minutes before adding the grapeseed oil. Using a slotted spoon or fork, carefully transfer the marinated tofu to the saucepan after the display reads “HOT.”
- Cook the tofu for 12 minutes, stirring occasionally. Flip and cook the tofu with a spatula until it begins to brown on all sides, 3 to 4 minutes total. Stir in the ginger-chilli sauce until everything is well combined. Choose the Cancel option.
- Set the Pressure Release to Sealing and secure the lid. Set the pressure cooker to high pressure and 3 minutes for the cooking time.
- When the 3-minute timer whistles, quickly release the pressure by carefully rotating the Pressure Release knob from Sealing to Venting.
- Remove the lid from the pot. Toss the broccoli florets with the tofu and the sauce until everything is well combined. Set the Pressure Release to Sealing and secure the lid. Set the pressure cooker to low pressure and 1 minute for the cooking time. After the 1-minute timer has beeped, carefully conduct another fast pressure release.
- Whisk the cornstarch and 14 cups water together in a small bowl until smooth and lump-free.
- Select the Sauté option and press the Sauté button until you reach the Less heaving stage. Pour the cornstarch slurry into the Instant Pot, stirring gently to combine. e. Cook for 2 to 3 minutes, occasionally stirring until the sauce thickens.
- Arrange the tofu and broccoli on a bed of rice and enjoy this Chinese Instant Pot vegan takeout-style dish with your kids.

3. Red Curry Quinoa Instant Pot Vegan Fried Rice Recipe
This red curry quinoa Instant Pot vegan fried rice is a one-pot vegan dinner with vegetables, quinoa, red curry sauce, coconut milk, and Thai basil!
This quinoa-fried “rice” is higher in protein than regular fried rice, and it's a terrific way to use any leftover red curry paste.
Prep time: 10 minutes | Cook time: 25 minutes | Total time: 35 minutes | Servings: 3
Ingredients
- Quinoa: 1 cup
- Coconut milk: 1 cup
- Water: ½ cup
- Oil: 1½ tablespoons
- Garlic: 3-4 large cloves, chopped
- Ginger: 1-inch, chopped
- Yellow onion: 1 medium, chopped
- Carrot: 1 large, cut into rounds
- Red pepper: 1 large, chopped into ½ inch pieces
- Broccoli: 1 cup, small florets
- Green peas: ¼ cup
- Red curry paste: 2 tablespoons or to taste
- Soy sauce: 2 teaspoons
- Sea salt: ¼ teaspoon or to taste
- Thai basil: ¼ cup, chopped
- Green onion: 2-3 stalks, chopped
- Lime: 1 small, juiced
Method
- Rinse the quinoa in a sieve for 2 minutes to remove the bitterness. Then, place it in the inner steel pot of your Instant Pot.
- Stir in 1 cup coconut milk and ½ cup water. After closing the lid, press the manual or pressure cook button. Cook for 2 minutes on high pressure with the pressure valve set to seal. Allow the pressure to dissipate naturally.
- After opening the lid, fluff the quinoa with a fork and place it in a mixing bowl. After wiping down your Instant Pot, put the steel pot back in the IP and press the sauté button to begin.
- When the pan appears hot, add the oil, then the chopped garlic, ginger, and onion. Cook for another 2 minutes or until the onions have softened.
- Add the carrots, red pepper, broccoli florets, and frozen peas. Cook for 3 minutes, stirring frequently, until the vegetables have softened slightly.
- After that, add the curry paste and soy sauce. Combine all of the ingredients thoroughly. Add the salt to the other ingredients and stir thoroughly.
- Return the cooked quinoa to the pot now. Stir until all of the quinoa is thoroughly mixed.
- Remove the lid from the Instant Pot and add the Thai basil and green onion. Lime juice should be added now.
- Serve this red curry quinoa Instant Pot vegan fried rice with hot sauce.

4. Instant Pot Vegan Coconut Rice Pudding Recipe
Instant Pot Vegan Coconut Rice Pudding is light and flavourful. This five-ingredient Instant Pot Dump and Start recipe is easy to make. You'll love how quickly this pressure cooker coconut rice pudding comes together!
Prep time: 5 minutes | Cook time: 3 minutes | Total time: 8 minutes | Servings: 5
Ingredients
- Coconut milk: 1 14 oz can
- Water: 2½ cups
- Sugar: ¼ cup
- Sea salt: ⅛ teaspoon or to taste
- Cinnamon Stick: 1
- Unsweetened shredded coconut: ¼ cup
- Arborio rice: 1 cup
- Raisins: ½ cup
Method
- Fill the pressure cooker with coconut milk. Stir it well to dissolve the coconut cream. Combine the water, sugar, and salt in a mixing bowl.
- Add the rice, cinnamon stick, and coconut if used. If using, add the raisins. Stir. Close the lid and turn the steam release knob to the Sealing position. Then select 3 minutes by pressing the Pressure Cook/Manual button or dial, then the +/- button or dial.
- The pot will take a few minutes to reach pressure. Once the cook cycle has finished, allow the pot to sit undisturbed for 10 minutes (a 10-minute natural release), then turn the pot off.
- To manually remove the remaining steam/pressure, slowly turn the steam release knob to the Venting position. If any rice pudding starts to come out of the vent, return the knob to Sealing and release the steam in short bursts.
- When the pin in the lid falls, open the lid and stir the rice pudding. It will be pretty thick and thicken even more as it cools (stir in some water or more coconut milk if you want it thinner). Remove the cinnamon stick and discard it.
- Warm or chilled, top the vegan coconut rice pudding with toasted coconut, coconut cream, fresh mangoes, or other desired fruit.

5. Instant Pot Vegan Cheesecake Recipe
This guide includes advice for achieving the ideal cheesecake flavour without dairy, the proper Instant Pot cooking times and settings for that beautiful, rich cheesecake texture, and a delicious yet wholesome Instant Pot recipe for a classic vegan cheesecake.
Prep time: 30 minutes | Cook time: 45 minutes | Total time: 1¼ hours | Serving size: 10
Ingredients For The Crust
- Gingersnap cookies: 20
- Pecans: ½ cup
- Sea salt: 1 pinch
- Coconut oil + more as needed: 2 tablespoons, melted
Ingredients For The Cheesecake Filling
- Raw cashews: ¾ cup, soaked for 8 hours or overnight and drained well
- Coconut cream: ⅔ cup, refrigerated for at least 24 hours to solidify
- Vegan cream cheese: ⅔ cup
- Coconut oil: 2 tablespoons, melted
- Lemon juice: 3 tablespoons, freshly squeezed
- Organic cane sugar (or sweetener of choice): ⅓ cup
- Arrowroot powder or cornstarch: 1 tablespoon
- Pure vanilla extract: 1 teaspoon
- Sea salt: ⅛ teaspoon or to taste
Ingredients For The Strawberry Sauce
- Fresh strawberries: ¾ pound
- Lemon juice: 1½ tablespoons, freshly squeezed
- Organic cane sugar: ¼ cup
- Cornstarch (or arrowroot powder): 1 tablespoon
- Water: 2 tablespoons
Method
- Trace a circle on parchment paper with the bottom of a 7-inch springform pan and cut the paper around. For easier removal, line the bottom of the pan with the parchment circle (or generously grease with cooking spray). Using cooking spray or oil, lightly coat the edges of the cake pan.
- To make the crust, mix the gingersnaps, pecans, and salt in a food processor and pulse until the nuts and cookies are almost entirely crushed. Pour the melted coconut oil while the machine runs, scraping down the edges with a silicone spatula. You want a slightly sticky crust that can be pressed with your fingertips.
- If it doesn't cling together, add a little more oil. Press the crust into the bottom of the prepared springform pan. While you're making the filling, put the crust in the freezer.
- Note: To get a crispy crust, instead of chilling it, pre-bake it at 350°F for 10-12 minutes.
- To make the cheesecake filling, combine all ingredients in a mixing bowl. In a food processor, combine the soaked and drained cashews with the thick coconut cream until the consistency resembles ricotta cheese. Blend in the other ingredients, scraping down the sides until smooth and creamy.
- Pour the cheesecake batter over the crust. Smooth out the top with a silicone spatula, and cover the pan tightly with foil.
- Place the springform pan on the steamer rack (handles facing up) and the foil sling (if used) beneath the steamer rack on the counter. Instructions for making a foil sling are on page 21 of my cookbook or 05:33 in the video.
- Fill the inner pot of the Instant Pot with 1½ cups of water. Using the foil sling or the steamer rack handles, carefully drop the steamer rack and pan into the inner pot.
- Set the Pressure Release to Sealing and secure the lid. Select the Pressure Cook option and set the timer for 35 minutes at high pressure. Once the 35-minute timer has finished and beeped, allow a natural pressure release.
- Using oven mitts, remove the pan from the Instant Pot by grasping the foil sling or steamer rack handles. Gently remove the foil cover, taking care not to spill any moisture onto the cake. Use the corner of a paper towel to absorb any water on the cake's surface.
- On a wire rack, chill the cake to room temperature. Cover the cake with plastic wrap and chill for at least 4 hours (I placed mine in the freezer instead of the fridge, which was still delicious after 3 hours). Serve with a dollop of Strawberry Sauce on top.
- Dice half the strawberries and cut the remaining half to make the sauce. Combine the chopped strawberries, sugar, and lemon juice in a small saucepan and simmer over medium heat. Cook for ten minutes or until the strawberries have broken down. In the meantime, make a slurry using cornstarch and water.
- Stir in the slurry until the sauce has thickened and become syrupy. Then, gently toss the halved strawberries to coat them in the sauce. Remove from the fire and set aside to cool completely before pouring over the cheesecake.

Conclusion
Adding Instant Pot vegan recipes to your weekly meals is a simple way to bring more flavour, convenience, and nourishment into your routine.
Whether you’re preparing comforting soups, hearty mains, or satisfying side dishes, the Instant Pot can make plant-based cooking quicker and more enjoyable.
One of the best things about these recipes is how easily they fit into busy lifestyles. With minimal effort, you can create wholesome meals packed with plant-based goodness and rich flavours the whole family can enjoy.
Whether you’re just starting your vegan journey or have been enjoying plant-based cooking for years, these Instant Pot vegan recipes can help make everyday meals both simpler and more delicious.
I trust you enjoyed this article on the 5 Delicious Instant Pot Vegan Recipes. Please stay tuned for more plant-based recipes, vegan travel tips, and lifestyle inspiration.
Take care!
— JeannetteZ 🌿
💬 Your Opinion Is Important To Me
Do you have thoughts, ideas, or questions? I’d love to hear from you. Please leave your comments below, or email me directly at Jeannette@LivingTheVeganLifestyle.org.
📚 More Vegan Lifestyle Reads
🌱 My #1 Recommendation for Online Success
Sharing my passion for vegan living — from food to fashion — has been such a rewarding journey.
If you’ve ever dreamed of building your own ethical lifestyle brand or blog, this is the best place to start.
🌟 See How Vegan Bloggers Build Online Income — Try WA Free (No Credit Card Needed)
Disclosure
This post may contain affiliate links. As an Amazon Associate and participant in other affiliate programs, I earn from qualifying purchases at no extra cost to you. Please read my full affiliate disclosure.