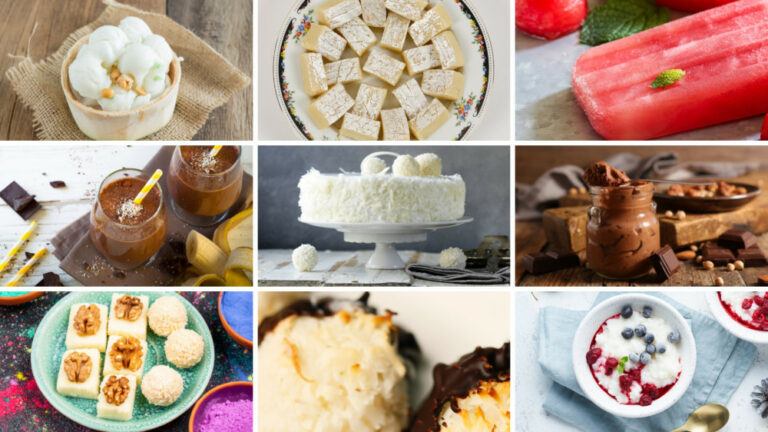
8 Best Vegan Wedding Dessert Recipes

8 Best Vegan Wedding Dessert Recipes
Weddings are a sweet tooth's paradise, and if you're vegan, you might be worried that your dessert options are limited to a fruit salad and some lukewarm almond milk.
Fear not! We've got your back with these 8 best vegan wedding dessert recipes. They will happily make even the most devoted dessert connoisseur dance.
So, put away that fruit salad and get ready to wow your guests with treats that are not only cruelty-free but also drool-worthy.
Let's turn that wedding dessert table into a vegan dessert extravaganza!

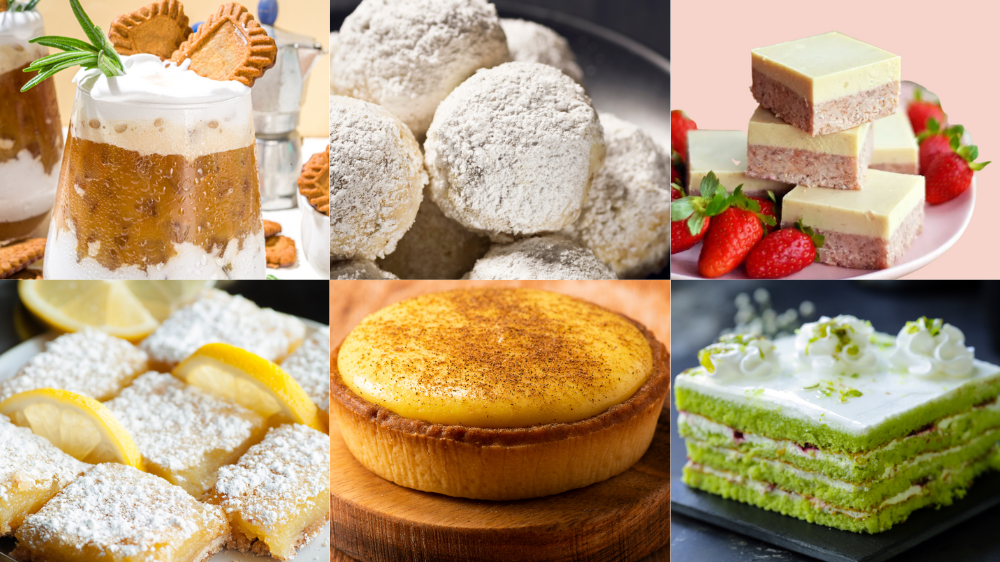
1. Vegan Mexican Wedding Cookies
These Vegan Mexican Wedding Cookies are a delightful twist on a classic treat. They feature a buttery, nutty flavour and a melt-in-your-mouth texture—perfect for special occasions or everyday indulgence.
Prep time: 10 minutes | Cook time: 20 minutes | Total time: 30 minutes | Servings: 12
Ingredients
- All-purpose gluten-free flour: 2 cups
- Organic cane sugar, powdered: ¾ cup
- Salt: ¼ teaspoon
- Pecan, finely chopped: 1 cup
- Non-dairy butter softened: 1 cup
- Vanilla: 1 teaspoon
- Almond extract: 1 teaspoon
- Extra powdered sugar for rolling
Method
- Heat your oven to 350°F. Put parchment paper on a baking pan and set it aside.
- Mix bowl with flour and powdered sugar. Mix in the salt and pecans.
- After adding the butter, almond, and vanilla extracts, stir them to form a dough. If the dough is too dry, add 1-2 teaspoons of water.
- After an hour in the fridge, the dough should be firmer and easier to handle. Divide the dough into 24 equal pieces, roll each into a ball, and bake for about 24 minutes. Bake for 20 minutes.
- After lightly coating each heated cookie with powdered sugar, put it on a cooling rack to finish cooling.

2. Vegan Wedding Biscoff Ice Cream
This easy and quick vegan wedding biscoff ice cream has only four ingredients. It tastes deliciously like Biscoff cookies.
Prep time: 5 minutes | Cook time: 0 minutes | Total time: 5 minutes | Servings: 2
Ingredients
- Frozen bananas sliced: 2
- Soy milk or other plant milk: 1 tablespoon
- Biscoff spread cookie butter: 2 tablespoons
- Biscoff biscuits broken into pieces: 3
Method
- Put each ingredient into a high-speed blender or food processor.
- Blend the ingredients until they are smooth. You might want to scrape down the sides once or twice.
- Enjoy immediately if you prefer a soft, scoopable texture, or move to a closed container and freeze for a few hours.
- For the ultimate Biscoff experience, top with additional biscuits and a drizzle of heated chocolate spread!

3. Wedding Coconut Caramel Chocolate Tarts
These Wedding Coconut Caramel Chocolate Tarts combine rich chocolate, creamy caramel, and coconut for a decadent treat. They are ideal for bringing a hint of refinement to your big day.
Prep time: 45 minutes | Cook time: 1½ hours | Total time: 2¼ hours | Servings: 20
Ingredients For The Base
- Rolled oats: 1½ cups
- Cacao: 2 tablespoons
- Coconut oil: 1 tablespoon
Ingredients For The Coconut Caramel Filling
- Light coconut milk: 1- 270 ml can
- Pure maple syrup: 1 tablespoon
- Coconut sugar: 1 tablespoon
- Coconut oil: 1 teaspoon
- Coco2 original spread to drizzle over the top of completed tarts
Method
- Once you've thoroughly incorporated all the base components, you can add a little water to the food processor to aid in mixing. It should be moist enough to stick together but not soggy.
- Sparingly spray olive oil in a mini muffin tray. Then, put about a spoonful of the mixture into each hole. Each tart case should be shaped with a firm downward press; use your thumb to build up the sides and make a well in each center. When done, place all 12 in the refrigerator to set.
- Put the filling ingredients in a small pot and cook them gently. Bring to a boil, then simmer what you want. Watch it closely to prevent a boil-over. It will thicken.
- After thickening the mixture, remove the pan from the heat and spoon some into each tart case.
- When they are all filled, put them back in the refrigerator to set. This process will take about an hour. Once they have dried, you must remove them from the tin.
- Grab a small, sharp knife and slide it down one side of the tart to loosen it. If the tart still doesn't pop out after that, move the knife down the other side, and it should work.
- Sprinkle with the Coco2 original spread and add some toasted coconut on top.

4. Vegan Wedding Custard Tart
This vegan wedding custard tart is made in a bakery style. It has a buttery shortcrust foundation, a creamy custard filling, and ground nutmeg sprinkled on top. It's simple and adaptable!
Prep time: 30 minutes | Cook time: 10 minutes | Total time: 40 minutes | Servings: 8
Ingredients For The Shortcrust Pastry
- All-purpose plain flour: 1¼ cups
- Vegan butter or margarine: ⅓ cup
- Granulated sugar or coconut sugar: 3 tablespoons
- Cold water: 1 tablespoon, if needed
Ingredients For The Custard
- Thick scoopable canned coconut cream: 1½ cups
- Coconut milk: 1¼ cups
- Tapioca starch: ½ cup
- Granulated sugar: ⅓ cup or maple syrup to taste
- Vegan butter: 2 tablespoons (optional for extra richness)
- Vanilla extract: 1 tablespoon
- Turmeric: 1 pinch
- Black salt: 1 pinch
Ingredients To Decorate
- Ground nutmeg
Method
- Making the pastry
- Set the oven to 180°C. Line an 8-inch (20 cm) loose-bottom tart pan.
- The base ingredients should all be combined in a medium bowl or food processor. If the mixture is too crumbly, add more water and continue mixing until a flexible dough forms. Add a little extra flour and re-mix if the mixture is too wet.
- Roll out the pastry into a thin circle 5 mm (¼ inches) thick on a surface dusted with flour. Transfer the pastry to the tart pan and press it against the bottom and sides to create a crust.
- Get rid of the extra. Use the remaining pastry to fill any gaps that may exist. When baking, prick the bottom with a fork to allow hot air to escape.
- Bake the crust for 10-15 minutes or until the pastry turns golden. Let the pastry cool in the tart pan. Add all ingredients to a medium pot to prepare the custard (without heating). Whisk until there are no longer any corn flour lumps.
- Set the pot over a medium heat source. Stirring often, cook the mixture for 10-15 minutes. Taste it, and add it if the custard needs additional butter, vanilla, or black salt.
- When you lift your whisk and see small custard “ribbons,” the mixture is ready. The custard should have a thick custard consistency and coat the back of a spatula.
- After cooling for ten minutes, remove the pot from the heat and stir it once or twice. Whisk briskly or use a stick blender to puree if lumps form.
- Once the custard has thickened further, pour it into the tart base. Set aside in the refrigerator for at least 4 hours (or, if you're in a hurry, 1–2 hours in the freezer).
- When the tart is ready, it only gives slightly when you press it, but it is somewhat wobbly. Serve the tart after you sprinkle nutmeg on it.
- The tart can be stored in the refrigerator in an airtight container for up to five days.

5. Raw Lime And Pistachio Slice
This raw lime and pistachio slice can be made without baking. It is dairy-free, gluten-free, and without refined sugar.
Prep time: 30 minutes | Cook time: 12 minutes | Total time: 42 minutes | Servings: 8
Ingredients For The Base
- Pistachios: ½ cup
- Cashews: ½ cup
- Desiccated coconut: 1 cup
- Medjool dates pitted: 1 cup
- Lime juice: 1 tablespoon
- Pinch of salt
Ingredients For The Centre Layer
- Cashews: 2 cups, soaked overnight
- Coconut cream: ⅔ cup
- Desiccated coconut: 1 cup
- Rice malt syrup: 3 tablespoons
- Lime zest: 2 limes
- Lime juice: 4 tablespoons
Ingredients For The Top Layer
- Baby spinach leaves: ½ cup
- Avocado: ½
- Coconut cream: ¾ cup
- Desiccated coconut: ½ cup
- Rice malt syrup: 3 tablespoons
- Lime juice: 3 tablespoons
- Cashews: ½ cup, soaked overnight
Method With A Thermomix Blender
- Use baking paper to line a 20 x 20 cm cake pan. Put the dates in a blender and run it at speed 8 for 10 seconds. Blend the remaining essential ingredients for 20 seconds on speed 8, scrape down the sides, and then blend for another 10 seconds on speed 8.
- If not, add a tablespoon of water and combine for 15 seconds at speed 8 until it resembles dough. The mixture should be pressed into the cake pan's base. Put the cover in the freezer to set. Blend the components for the center for 1 minute on speed 8 to achieve a smooth and creamy texture.
- If necessary, scrape the sides, then blend for 20 seconds at speed 8 until smooth. Pour the mixture over the bottom layer and return it to the freezer.
- Place the top ingredients in a mixing bowl, blend on speed 8 for 20 seconds, scrape down the sides, and blend again for 15 seconds. Pour over the center and, for payback, tap the tin against a bench. Place in the freezer and leave for two hours. When solid, cut into 16 squares. Straight from the freezer, store and serve.
Method Without A Thermomix Blender
- Use baking paper to line a 20 x 20 cm cake pan. Process the dates until smooth. Add the remaining base ingredients and pulse to mix. If not, add a tablespoon of water and pulse the ingredients. The mixture should come together like dough. Press the mixture into the cake pan's base. Put the cover in the freezer to set.
- Blend the ingredients for the center in a food processor until they are creamy and smooth. Scrape the sides if necessary, then blitz once more. Pour over the bottom layer and place back in the freezer.
- Add the ingredients and process until smooth. Pour the mixture over the middle layer, tap the tin on a bench, and place in the freezer for two hours to solidify.
- Cut into 16 squares when solid. Serve straight from the freezer. Store any leftovers in the freezer.

6. Vegan Paleo Lemon Bars
These vegan paleo lemon bars are made without dairy and are a light treat that requires 10 minutes to prepare. You'll adore the crust with raw dates, nut filling, and banana undertones. These lemon bars are dairy-free, vegan, and paleo.
Prep time: 10 minutes | Cook time: 0 minutes | Total time: 10 minutes | Servings: 16
Ingredients For The Crust
- Raw cashews: ¾ cup
- Walnuts: ¾ cup
- Medjool dates: 12, pitted
- Filtered water: 1 tablespoon
- Hemp seeds: 1½ tablespoons
- Pinch sea salt
Ingredients For The Lemon Topping
- Medium ripe bananas: 3
- Pure maple syrup: 2 tablespoons + ⅓ cup
- Coconut oil: ¾ cup
- Lemons juiced: 4
- Lemon zest: 2½ tablespoons
- Turmeric: 1 teaspoon
- Collagen peptides: 3 scoops
- Pure vanilla extract: 1 teaspoon
Instructions
- Soak the Medjool dates in boiling water for 5 minutes and drain them well before adding them to the food processor.
- Dates and nuts should be combined and pulsed in a food processor. Take a minute or so to blend this thoroughly. Salt, hemp seeds, and water can now be added. Continue to process until the mixture resembles a paste.
- When you push the mixture with your fingertips against the side of the food processor, it should stay together and resemble a crust. Transfer the mixture to an 8×8″ square pan lined with parchment paper, pressing it into the bottom and edges.
- Clean and dry the food processor. Blend the ingredients for the lemon topping until the mixture develops a milkshake-like texture.
- The mixture should be poured over the crust. If desired, sprinkle powdered sugar on top. Wrap plastic wrap around the dish. For 24 hours, place the bars in the freezer to set. Run a knife under hot water before cutting them into squares when ready to consume them. These vegan paleo lemon bars can be stored in the freezer for up to three months.

7. Raw Strawberry Lime Macadamia Squares
This delicious and simple no-bake slice is made with raw strawberries, lime, and macadamias. It is healthy and guilt-free, with no flour, dairy, or refined sugars. You can eat this delicious snack straight from the freezer.
Prep time: 10 minutes | Cook time: 0 minutes | Total time: 10 minutes | Servings: 12
Ingredients For The Base
- Medjool dates pitted: 8
- Strawberries, chopped: 1 cup
- Banana: ¼
- Macadamia nuts: 2 cups
- Melted coconut oil: 3 tablespoons
- Chia seeds: 3 tablespoons
- Desiccated coconut: ½ cup
- Vanilla extract: 1 teaspoon
Ingredients For The Top Layer
- Macadamia nuts: 1 cup
- Melted coconut oil: ½ cup
- Maple syrup: ½ cup
- Lime juice: 4 tablespoons
- Vanilla extract: 1 teaspoon
Method With A Thermomix Blender
- I lined a 24 cm × 24 cm cake pan with parchment paper. Add dates to the blender's mixing bowl and set the speed to 10.
- Blend the remaining base ingredients for 20 seconds on speed 8. If not, add a tablespoon of water and blend for 10 seconds on speed 8. The ingredients should come together like dough.
- Place the prepared base in the freezer to harden by spreading the mixture evenly over the prepared tray.
- The icing ingredients should be added to the clean, dry mixing bowl. Blend for one minute at speed 8 to achieve a smooth, creamy texture.
- Take the tray out of the freezer, add the icing, and place it in the refrigerator or freezer. Once it has dried, cut the icing into 16 squares and store them in the freezer or refrigerator.
Method Without A Thermomix Blender
- I lined a 24 cm × 24 cm cake pan with parchment paper.
- In a food processor, puree the dates until they are smooth.
- When just blended, add the other foundation ingredients and pulse. If not, add a tablespoon of water and pulse the ingredients. The mixture should come together like dough. Spread the mixture evenly over the prepared tray and place the prepared base in the freezer to harden.
- After thoroughly cleaning and drying the processor, add all the icing ingredients and process until well combined.
- Take the tray out of the freezer, add the icing, and place it in the refrigerator or freezer.
- Once firm, cut the raw strawberry lime macadamia cake into 16 squares and store them in the freezer or refrigerator.

8. Vegan Chocolate Mint Slice
This dreamy vegan chocolate mint slice has chewy layers of coconut, cashew, and mint filling topped with a smooth, velvety chocolate layer dusted with cacao nibs and additional mint leaves.
The chocolate layer is then drizzled with raw cacao powder. Your taste buds will dance after eating this delicious and simple treat!
Prep time: 40 minutes | Cook time: 3 hours | Total time: 3 hours 40 minutes | Servings: 6
Ingredients For The Base
- Oat: 1 cup made into flour
- Cacao powder: ¼ cup
- Prunes: 1 cup
- Coconut oil melted: 2 tablespoons
Ingredients For The Mint Layer
- Cashew: 1 cup, soaked and drained
- Coconut oil: 3 tablespoons, melted
- Coconut cream: 1 cup
- Fresh mint leaves: ½ cup, lightly packed
- Mint extract: 4-5 drops or to taste
- Spirulina powder: ½ teaspoon
- Coconut nectar: 1 tablespoon
Ingredients For The Chocolate Layer
- Vegan Cheese: 1½ bricks
- Cacao powder: ¼ cup
- Dates: 7
- Nut milk: ¼ cup
- Chia seeds: 1 tablespoon
- Coconut oil melted: 1½ tablespoons
Method For The Base
- The ingredients for the base should be combined in a high-speed blender or food processor and processed until the mixture resembles small crumbs and holds together when squeezed.
- The mixture should be poured into a lined loaf pan that measures 25 x 13 x 8 cm. Press the mixture down with the back of a spoon. Incorporate the freezer.
Method For The Mint Layer
- Place all ingredients in a high-speed blender and process until they are creamy and smooth.
- Place the base in the freezer and then top with the cream (about an hour).
Method For The Chocolate Layer
- For the chocolate layer, put everything in the high-speed blender and blend until smooth. After pouring the cream over the mint cream layer, place the pan in the freezer for two to three hours to let the cream set.
- Remove from the tin, slice immediately, and keep in the refrigerator for three to four days in an airtight container (separate them with parchment paper so they don't cling together). Sprinkle some cacao nibs and dust with cacao powder when ready to serve. Enjoy!
Conclusion
Place chocolate-covered snacks, such as Rice Krispies bars and caramel apples, on a table. Alternately, serve a chocolate fountain with dipping options like fruit skewers, bite-sized brownies, and soft pretzels (for that delectable salty-sweet combo). If your wedding's colour scheme excludes chocolate brown, choose another hue.
I trust you enjoyed this article about the 8 Best Vegan Wedding Dessert Recipes. Please stay tuned for more blog posts soon. Take care!
JeannetteZ
>>>Please click here to read my Vegan Travel Guides To World Destinations<<<
>>>Want To Learn How To Create Delicious, Cruelty-Free, Healthy AND 100% Vegan Meals? Try These Awesome Vegan Cooking Courses With A Free 7-DAY MEMBERSHIP<<<
Your Opinion Is Important To Me
Do you have thoughts, ideas, or questions? I would love to hear from you. Please leave me your questions, experience, and remarks about this article on the 8 Best Vegan Wedding Dessert Recipes in the comments section below. You can also reach me by email at Jeannette@LivingTheVeganLifestyle.org.
Disclosure
This post may contain affiliate links. I earn from qualifying purchases as an Amazon Associate and other affiliate programs. Please read my full disclosure.
Here are links to some of my favourite articles:
8 Best Vegan Cocoa Recipes For Your Kids
15 Best Vegan Cocktail Recipes
6 Best Vegan Parsnip Recipes For Your Kids
7 Best Vegan Flax Seeds Recipes For Your Kids
8 Best Vegan Christmas Recipes For Your Kids