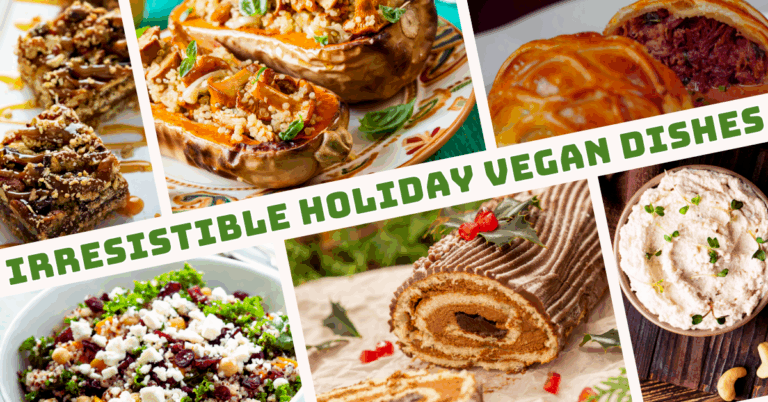
8 Delicious Homemade Vegan Cheese Recipes For Your Kids
8 Delicious Homemade Vegan Cheese Recipes For Your Kids
Are you craving creamy and flavourful cheese without the dairy? Our homemade vegan cheese recipes will inspire you to create delicious, plant-based alternatives right in your kitchen.
These recipes suggest that you don't have to give up flavour to follow a vegan diet, featuring meltable mozzarella and tart spreads.
Simple, healthy, and flavourful, each recipe is ideal for both novice and experienced cooks. Get ready to indulge guilt-free!
Health Benefits Of Homemade Vegan Cheese
1. Healthy For Your Heart
A study in 2021 shows that high consumption of plant-based food can significantly lower the risk of heart disease. These homemade vegan cheese recipes have fewer processed ingredients and are more natural than regular cheese.

2. Healthy For Your Gut
Probiotics protect the gut microbiota and keep it healthy since they contain live bacteria and yeast that are essential for a healthy digestive system. Homemade vegan cheese doesn't contain opioid peptides that can increase intestinal permeability and constipation.
3. Lessens The Risk Of Cancer
Eating homemade vegan cheese and plant-based food, in general, can also help lessen the risk of cancer by as much as 15%. With its high fibre content and vitamins, the body can stave off possible diseases with the help of a plant-based diet, including vegan cheese.

4. Helps With Weight Loss
Homemade vegan cheese also aids in weight loss since it has fewer calories and can help people manage and watch their weight.
5. Reduces Respiratory Problems
These homemade vegan cheese recipes don't contain casein or lactose, which are very difficult to digest. They end up in the blood and produce mucus, respiratory problems like asthma, and autoimmune disorders.
I had asthma all my life. The asthma attacks stopped when I switched to a vegan diet and started eating homemade vegan cheese.

6. Provides Healthy Energy
Homemade vegan cheese is chewy and delectable. You can add the ingredients you love. They also provide your body with energy in the form of carbohydrates and fibre.
7. Contains Calcium And Vitamins
Some of the homemade vegan cheese recipes are nut-based, a great source of minerals like calcium and trace elements. They're rich in vitamins such as A, C, E, and B complex.
8. Free Of Antibiotics
The homemade vegan cheese does not contain animal products and no antibiotics.

9. Accommodates People With Gluten, Dairy, Soy, And Nut Allergies
We can make our homemade vegan cheese gluten-free, soy-free and dairy-free. We can also accommodate people with nut allergies. You can alter and adapt the ingredients used for the homemade vegan cheese.
10. Toxin-Free
Eating vegan cheese prevents residues of bacteria, hormones, pus, and toxins in regular dairy cheese. These are generated by antibiotics, pesticides, disinfectants, and other chemicals ingested by cattle.

Advantages Of Making Your Homemade Vegan Cheese
- Homemade cheese is fresh.
- You can store this vegan cheese in a glass container ( It is not wrapped in plastic)
- Free of preservatives
- You can adapt it to match your taste buds.
- You can adapt it to any allergies.
- It costs less
- It is easy to make
Is It Possible To Eat Vegan Cheese?
Have you been a vegan for a long time, say more than two years? You're undoubtedly missing cheese. The store-bought products are unlikely to live up to your expectations, but this vegan cheese will! This is something that even non-vegans like!
Vegan cheeses don't fulfill most people's cheese appetites, but this recipe gets very close! I've served a cheese plate at several parties and family gatherings, and I'm always surprised by how many dairy eaters adore my coconut cheese. (It's also impolite to consume all the vegan cheese at a gathering and leave the vegans hungry.)
Ingredients
- Coconut Milk: There are various ways to make vegan cheeses, but I've discovered that using a can of full-fat coconut milk produces the richest and creamiest vegan cheese. You could replace the coconut milk with another plant-based milk or even cashew cream, but I prefer the rich, creamy texture of coconut milk in cheese. (You can also use coconut cream.)
- To add the correct quantity of moisture, use water.
- Agar-Agar Powder is used to firm up the cheese. This powdered vegan gelatine comes in a variety of flavours. My favorite place to acquire it is at my local Asian market, but it's also available at many natural foods shops. (If you can't locate the powder, use agar-agar flakes instead; however, you'll need to increase the number of flakes and use 6 tbsp total.) You can also use equal amounts of Kappa carrageenan instead of agar agar powder.
- For a cheesy flavour, use nutritional yeast. It's a flaky golden powder with a savoury umami taste, which gives it the cheese flavour, so don't skip it.
- For taste, add a little salt.
- For flavour and acidity, you can use lemon juice. You can substitute the lemon juice with apple cider vinegar, which adds a little bite to your cheese.
- Tapioca Starch (sometimes known as tapioca flour) is used to help the cheese melt and stretch. (Use just for the meltable variant.) The amount of tapioca starch required has been tested and retested. Anything less than the necessary quantity will need a lot of heat to melt, and anything more will be too soft to grate or slice. Tapioca starch is the only starch that has the same stretchable effect as tapioca starch. Only tapioca starch allows your cheese to melt and expand like real cheese.
Homemade Vegan Cheese Recipes

1. Sliceable Cashew Cheese
Are you vegan and craving cheese? You must try this homemade sliceable cashew cheese recipe. It is perfect for serving with crackers, sandwiches, and gluten-free, vegan croissants!
It is super simple to make and can be whisked together in less than 60 minutes. You will be able to slice it, grate it, and melt it! This cashew cheese is not only delicious but also oil-free, soy-free, and made from seven all-natural ingredients.
Ingredients
- Raw cashews: ⅓ cup (soak in a cup of water overnight)
- Nutritional yeast: 1 heaped tablespoon + 1½ teaspoons
- Garlic: 1 clove (optional)
- Tapioca or arrowroot flour: 1½ teaspoons
- Agar-agar powder: 1½ teaspoons
- Fresh lemon juice: 1⅔ tablespoons
- Water: 1 cup, divided
- Salt – to taste
Method
- Add all the ingredients to a saucepan. Whisk to combine.
- Bring to a simmer for 6 minutes, stirring regularly. This enables the agar-agar to melt and set. (It might seem ready after 3-4 minutes, but leave it on a low boil for another 6 minutes to ensure total smoothness.)
- Then pour it into any container of your choice. (A single batch yields over 2 cups of cheese.)
- Allow for 15 minutes of cooling time without a cover on the cheese.
- Then cover with plastic wrap or a lid and place in the fridge for at least 2 hours to set.
Recipe Notes
- We sometimes add a pinch of turmeric for a deep yellow colour.
- Taste the cashew paste. If you like it to be tangier, feel free to increase the quantity of lemon juice.
- It will be a jelly-like consistency and not as firm as dairy cheese. However, you can hold and grate through the grater. Ours became a bit mushy, but we managed to pass it through the sieve.
- Tastes excellent with crackers

2. Melty Vegan Cheese
You must try this melty vegan cheese recipe that melts to make all your pizza, nachos, and grilled cheese dreams come true. We welcome you with open arms to make this recipe again and again– anytime a cheese craving strikes!
Prep time: 5-6 minutes | Cook time: 5-6 minutes | Total time: 10-12 minutes | Servings: 1 cup
Ingredients
- Vegan yogurt: 1 cup
- Distilled white wine vinegar: 1 tablespoon
- Salt: 1½ teaspoons
- Nutritional yeast: 1–2 tablespoons
- Miso: 1 tablespoon
- Tapioca starch: ¼ cup
Method To Create Vegan Cheese That Melts
- In a saucepan, combine all ingredients except ¼ cup water instead of ½ cup and 4 teaspoons agar-agar instead of 2 tablespoons.
- Over medium heat, cook the cheese sauce until it starts to boil.
- Reduce the heat to low and simmer for 5 minutes, stirring frequently.
- 2 tablespoons plus 1 teaspoon tapioca starch (equivalent to 7 teaspoons) in ¼ cup cold water, stir until completely dissolved.
- Cook for another minute after adding the starch and water combination to the boiling cheese sauce while stirring it in with a whisk. (Your cheese will thicken and stretch a lot.)
- Pour the cheese sauce into a glass container and chill for at least 3 hours, uncovered in the refrigerator before shredding.
Recipe Notes
- We recommend making a double batch of this– once you've tried it and know you love it– and keeping it on hand in the freezer! In a sealed container, it can last up to 3 months!
- Play with the flavours! Add spices or seasonings, fresh herbs, a dash of mustard or a sprinkle of liquid smoke to change the result!
- We both love paprika, ginger, parsley and oregano. So we add these ingredients to this melty vegan cheese.

3. Vegan Cheese Made With Potatoes And Carrots
This homemade vegan cheese made with potatoes and carrots tastes like the real thing. It's a delicious and healthy alternative to dairy cheese made with 9 ingredients in 30 minutes.
Prep time: 5-10 minutes | Cook time: 25-30 minutes | Total time: 30-40 minutes | Servings: 6
Ingredients
- Yukon Gold potatoes: 2 cups (360 g), peeled and diced
- Carrots: 1 cup (135 g), peeled and diced
- Water: ½ cup (125 ml)
- Nutritional yeast: ½ cup (35 g)
- Extra virgin olive oil: ⅓ cup (70 g)
- Fresh lemon juice: 1 tablespoon
- Salt: 1 teaspoon or to taste
- Garlic powder: ½ teaspoon
- Onion powder: ½ teaspoon
Method
- Steam the carrots and the potatoes until they are soft (about 20-25 minutes).
- Drain the two vegetables and add them both to a blender.
- Add the other ingredients and blend them until combined and smooth.
- Serve your freshly made vegan cheese right away. You can eat the non-dairy cheese with crudités, tortilla chips, or pita bread, or spread it onto a slice of gluten-free, vegan bread. We sometimes use it to make a vegan grilled cheese sandwich!
- Keep any leftover cheeses in the fridge in an airtight glass container. You can store it for 4-5 days. For a long time, put your vegan cheese into the freezer for up to 30 days. Ours never lasts that long, though.
- For best results, you can defrost the cheese in the fridge overnight. This way, the cheese will defrost on its own.
- Reheat it in a pan and add water, vegetable stock, or unsweetened plant milk if needed. You can reheat the vegan cheese in the microwave or on the stovetop over medium heat until warm.
Recipe Notes
- I've made this vegan cheese recipe with various potatoes, and it's always turned out great. You can use whatever you have at home.
- You can make it with cold, hot, or room temperature water. You could even use the water from boiling or steaming the vegetables. However, I prefer to use clean, room-temperature water.
- My preferred vegetable oil is extra virgin olive oil, but any vegetable oil will suffice.
- If you don't want to use oil, simply use the same amount of water or unsweetened plant milk like coconut or almond milk.
- If you can't find nutritional yeast in your area, you can substitute debittered brewer's yeast (in the same amount) or beer in place of water. However, you may need to use a little less.
- I prefer a measuring cup because not all nutritional or brewer's yeast brands weigh the same. If you don't have one, start with 8 tablespoons (35 grams) and add more as necessary.
- If you like spicy cheese, add a dash of cayenne powder. You can also add pepper, paprika, or your favourite herbs to make it your own.
- Store your vegan cheese in a sealed container in the freezer for weeks or even months. I usually transfer the container to the fridge the night before. That way, it defrosts by itself. Then I reheat it in a saucepan and add more water or even plant milk if needed.

4. Vegan Cheese Made With Yukon Gold, Sweet Potatoes And Cashews
This vegan cheese made with Yukon gold is an oozy, gooey vegan cheese sauce that is as good as the dairy version! It is versatile and easy to make. It's delicious on pasta, nachos, and more.
Ingredients
- Yukon gold potatoes: ¾ cup, peeled and diced
- Sweet potatoes: ¾ cup, peeled and diced
- Garlic: 2 cloves
- Raw cashews: ¼ cup
- Apple cider vinegar: 1 tablespoon
- Nutritional yeast: 2 tablespoons
- Onion powder: ½ teaspoon
- Sea salt: ½ teaspoon
- Extra-virgin olive oil: ¼ cup
- Water: ¼ cup
To add some pep to your cheese, try adding:
- Chipotle pepper: ½ to 1, finely chopped
- Pickled jalapeños: 1 teaspoon
- Smoked paprika: ¼ to ½ teaspoon or to taste
Method
- Steam the potatoes until they are tender for about 10 minutes.
- Drain them and transfer them to a high-speed blender together with the cashews, garlic, nutritional yeast, apple cider vinegar, onion powder, salt, olive oil, and water. Blend the ingredients until combined and smooth.
- We love spicy vegan cheese and like to add chipotle pepper or pickled jalapeños. Sometimes we add smoked paprika to give our cheese a smoky flavour.
- Serve your freshly made vegan cheese with tortilla chips for dipping or over pasta to make vegan mac & cheese.
Recipe Notes
We are using a high-powered blender, like a Vitamix. Therefore, we don't have to soak the cashews. For the use of a less powerful blender, you can soak them for 2 hours. Drain before adding to the recipe.

5. Delicious Vegan Cream Cheese
This delicious vegan cream cheese is made with raw cashews. We added spring onions, chives and Italian parsley. You can alternate the herbs or even add sage, rosemary and basil.
Ingredients
- Raw cashews: 1½ cups raw cashews, half-chopped if whole cashews (soaked overnight)
- Apple cider vinegar: 4 tablespoons
- Lemon zest: 1 teaspoon
- Fresh lemon juice: 2 tablespoons
- Water: 3 tablespoons
- Spring onions: 3, diced
- Chives: 2 tablespoons, chopped
- Flat-leaf parsley: 3 tablespoons chopped
- Sea salt: 1 teaspoon or to taste
- Freshly ground pepper: 1 teaspoon or to taste
Method
- Soak the cashews in 3-4 cups of water overnight or for up to 24 hours in the fridge. Drain the cashews and rinse them in the morning, and combine them with the cider vinegar, lemon juice, and water in a blender/food processor. Blend until smooth, adding up to another 2 tbsp of water if required.
- Transfer the cashew purée to a mixing bowl and fold in the remaining ingredients.
- Place a small 6′′ sieve over a bowl and line it with cheesecloth.
- Add the cashew mixture, level up the top, and gently fold the cheesecloth over the edges.
- Allow for two hours on the side before discarding the liquid drained into the bowl.
- Refrigerate for at least an hour to enable additional water to drain and the cream cheese to firm up.
- Allow the cashew cream cheese dome to set overnight before delicately unfolding the cheesecloth and turning it out onto a dish.
Recipe Notes
- You can alternate your herbs and spices to adapt the cream cheese to its uses.
- Keeps in the fridge for 5 days.
- Serve with crostini or crackers.
- I love this cream cheese on gluten-free, vegan bagels or a crusty, delicious French baguette.

6. Vegan Blue Cheese
This vegan blue cheese tastes like the dairy one! You make it using traditional cheese-making techniques and only 4 ingredients. A creamy, sharp and strong cheese.
Prep time: 50 minutes | Aging time: 35 days | Servings: 4 loaves of cheese
Ingredients
- Raw cashews: 3 cups
- Refined coconut oil: 2 tablespoons
- Mesophilic culture: ⅛ teaspoon (or 6 vegan probiotic pills (Acidophilus)
- Powdered penicillium roqueforti: ⅟₁₆ teaspoon (or ⅛ teaspoon liquid penicillium roqueforti)
- Filtered water: 5 tablespoons
- Sea salt: 1 teaspoon or to taste
Method On The Day Before
- Soak the cashews overnight or at least 5 hours in filtered water.
Method For The Process Of Making Cheese
- Place the cashews in a large glass dish after draining them. Bring a big pot of water to a boil. When the water is boiling, pour it straight over the cashews. Allow settling for 1-2 minutes before draining the cashews again. This procedure will aid in killing any germs that may be present.
- Place the cashews in the blender or food processor bowl. Add 5 tablespoons of filtered water, plus 5 tablespoons of coconut oil. Blend the ingredients on high speed, scraping down the sides as needed, depending on your blender. This step may take up to 12 minutes. You should have a thick, smooth mixture.
- Toss the probiotic powder into the blender after opening the pills.
- Add Penicillium roqueforti. Powdered penicillium roqueforti operates in the same manner as liquid penicillium roqueforti.
- Blend for an additional 10 to 15 seconds.
- The consistency of the vegan cheese mixture should be smooth yet thick. If necessary, drizzle in 1 tablespoon of water at a time until the mixture is smooth. You might want to be careful not to add too much water, or the mixture will become too liquid. In this recipe, you want it to be thick.
- Transfer the vegan cheese mixture to a clean dish, cover with plastic wrap and set aside for 24 hours at room temperature in a dark area to allow the cheese to ferment.
- Place the glass bowl with the vegan cheese in the refrigerator for 4 hours the next day to make the mixture simpler to process.
- After that, use parchment paper to line a baking sheet or a flat plate. On top, place four mini springform pans (for each cheese, I used two 3-inch cookie cutter rounds, stacked).
- Cut parchment paper into strips and place them in four tiny springform pans. You'll want to cover the pan's bottom and sides. If you like, you may cover the cashew mixture with plastic film; the purpose is to keep the cashew mixture from contacting the metal. Fill each pan halfway with the cashew mixture, pressing it down with plastic wrap to keep it from sticking to your hands.
- Place an upside-down container on the platter with the cheeses. This step is necessary to maintain some humidity inside, which is necessary for mould formation. Place the cheeses in the fridge to chill (you will age the cheeses covered in your refrigerator during the aging process).
Method For The Aging
- Sprinkle salt over the tops of the cheeses after 2 days and softly massage with clean hands. Remove the springform pan and carefully turn the cheeses using a small plate lined with parchment paper. Scatter salt over the top and sides, gently pressing it in. You'll just have to salt once. The cheeses will still be incredibly soft, but they will be simpler to handle after a few days.
- Every day, use clean hands to flip the cheeses. To avoid contacting the cheeses, use gloves or operate with a piece of plastic film.
- After around 7 days, blue mould should start to emerge. The mould will be somewhat darker or lighter. This depends on the temperature and humidity of your fridge.
- Scramble the cheeses into little pieces in a clean basin after 2 weeks (just like you would tofu). Because the cashew mixture will still be soft, cut it into little pieces. I strongly advise using latex gloves for this stage.
- Place strips of parchment paper in springform pans and fill with scrambled cheese, being careful not to overfill. This step is necessary to make holes in the cheese because the mould needs oxygen to thrive. After forming the cheeses, remove them from the springform plates immediately. Place the cheese on the baking sheet or plate, cover with plastic wrap or a container, and refrigerate.
- For the following three weeks, turn the cheeses daily, always using clean hands or gloves. Every day, this process takes just a few seconds.
- The interior and exterior of your cheeses will be coated with blue mould after 5 weeks. They are ready to eat!
- Wait 3-7 days after wrapping each cheese in cheese paper or aluminum foil. The greater the flavour, the longer you leave them in the fridge.
- The cheese will firm up in the refrigerator and become sharper after approximately a month.
Recipe Notes
- The size of the moulds has no fundamental importance. Use what you have on hand.
- Making this vegan blue cheese takes a long time, but it is worth the wait.
- We sometimes make a batch bi-weekly, so we always have some deliciously healthy vegan blue cheese to enjoy!

7. Dairy-Free Almond Feta Cheese
This recipe is only a little bit of work. However, you will have to be very patient! Please add the soaking, chilling, and fermenting times to the prep time.
Prep time: 30 minutes | Cook time: 5 minutes | Total time: 35 minutes | Servings: 1 pound
Ingredients For The Rejuvelac
- Whole grains: 1 pound (such as brown rice, Kamut berries, millet, oat groats, quinoa, rye berries, wheat berries, or a combination)
- Filtered water: 6 cups
Ingredients For The Feta Cheese Made With Almonds
- Blanched almonds: 2 cups, steeped in water for 12 to 24 hours
- Rejuvelac: 1 cup (see recipe notes)
- Sea salt: ¼ teaspoon or to taste
- Water: ⅔ cup
- Agar powder: 2 tablespoons
Ingredients For The Brine
- Water: 6 pints
- Kosher salt or sea salt: ¾ cup
Method For The Rejuvelac – Soaking And Sprouting The Grains
- To soak and sprout the grains, place them in a 1-quart glass jar with enough water to cover them. Cover the opening of the glass jar with a second layer of cheesecloth and attach it with a rubber band. Allow 8 to 12 hours for the grains to soak.
- Drain, then add enough water to moisten the grains without completely submerging them. Place the jar in a warm, out-of-direct sunlight location for a few days. Rinse the grains once or twice daily, draining thoroughly and moistening with just enough new water.
- Continue to do so until the grains start to sprout.
Method For The Rejuvelac Culture
- Using two 1-quart glass jars, divide the sprouted grains evenly. Fill each jar with 3 cups of filtered water. The fresh cheesecloth should be wrapped around each jar and secured with rubber bands. Place the jars in a warm, out-of-the-way location for 1 to 3 days. The water will become hazy and white, and the beverage will have a somewhat sour, lemon-like taste.
- Remove the grains and strain the liquid into clean glass jars.
Method For The Feta Cheese
- Drain and rinse the almonds for the almond feta. Blend them with the Rejuvelac and salt in a high-powered blender for 1 to 2 minutes, until smooth and no longer gritty on the tongue.
- Fill a clean container halfway with the mixture and cover with a nonpermeable lid or plastic wrap.
- Allow it to culture for 1 to 2 days on your kitchen counter, tasting it every day until it becomes tart. Remember that there is no hard and fast rule for how long it should take to culture—you'll have to trust your taste senses to tell you how long it should take. It may take a day in warmer weather, but it may take two days or more in chilly conditions.
- After the cheese has become somewhat sour, it starts to solidify. First, line an 8-inch square pan with cheesecloth to create the cheese mould.
- In a medium saucepan, mix the water and agar. Over low heat, cover the pan and bring it to a simmer. Wait for 3 to 4 minutes before peeking to see whether it's still bubbling. If you examine it too early, it may seem that it has solidified. However, if you continue to boil it over low heat for a few minutes more, it will liquefy and bubble away. Pour in the cultured almond mixture after the agar has completely dissolved, and whisk until entirely mixed.
- Pour the cheese mixture into the pan lined with cheesecloth. Refrigerate for several hours or until the mixture is firm.
- To make the brine, combine the water and salt in a large mixing bowl until the salt is almost dissolved. Place the cheese in the brine after cutting it into four pieces. Cover and set aside at room temperature for 8 hours.
- Pour the brine over the vegan cheese until it is partly buried, and place it in a storage container. Add plain or filtered water to cover the cheese and dilute the brine. Refrigerate for up to three or four months. After the first 3 to 4 weeks, the taste increases dramatically.
Recipe Notes
- I include the recipe for the Rejuvelac.
- You can also use sauerkraut juice or buy it in a store.
- Rejuvelac will keep for about 4 weeks in the fridge.

8. Easy Garlic & Herb Vegan Cream Cheese
This easy garlic & herb vegan cream cheese is infused with lemon, garlic, dill, and nutritional yeast for that extra cheesy flavour. It is soft, spreadable and delicious.
Prep time: 1 day 1 hour | Total time: 1 day 1 hour | Servings: 2 cups
Ingredients
- Raw cashews: 2 cups
- Garlic: 2 cloves minced
- Garlic powder: ½ teaspoon or to taste
- Lemon: 1 medium, zest
- Lemon: 1 medium, juiced (+1 use the zested one above)
- Water: ⅔-½ cup
- Nutritional yeast: 2 tablespoons
- Extra-virgin olive oil: 2 tablespoons
- Sea salt: ½ teaspoon or to taste
Method
- Fill a measuring cup halfway with lukewarm water and add cashews. Cover the glass cup and place it in the refrigerator for 12 hours* to soak. Drain, return to the dish, and cover with plastic wrap if you can't get to them immediately. You can store the soaked cashews in the refrigerator for up to 36 hours.
- Soak the cashews before you add them to a food processor. Combine minced garlic, garlic powder, lemon zest, lemon juice, water (beginning at the lower end of the range), nutritional yeast, salt, and olive oil in a mixing bowl.
- Scrape the sides and add more water until the mixture is creamy and smooth. Then, as required, taste and adjust spices, adding additional lemon zest for acidity, nutritional yeast for cheesiness, garlic for zing, or salt for flavour and balance.
- Over a large mixing bowl, place a fine-mesh sieve (or colander) and two layers of cheesecloth (or a clean, delicate, absorbent towel).
- Scoop all the cheese onto the cheesecloth using a spatula, then collect the corners and gently twist the top to make a “disc.” We usually use a rubber band to keep it in place.
- Refrigerate for at least 6 hours, ideally 12 hours, or until excess moisture has been absorbed and the cheesecloth keeps its shape when removed. The longer it stays in the refrigerator, the firmer it becomes.
- To serve, carefully flip the cheesecake onto a serving tray after unwrapping it from the cheesecloth. As required, reform with your hands or cheesecloth, then top with chopped herbs and a pinch of lemon zest (optional). Handle it with care since it is delicate.
- With crackers or vegetables, serve chilled. The cheese will keep its shape out of the refrigerator for 1-2 hours, but it is finest when cold. Refrigerate leftovers for up to 5 days, firmly covered.
Recipe Notes
- If you're in a hurry, you can quick-soak the cashews by covering them with boiling water and letting them soak for 1½ hours. Drain the cashews and follow the recipe as instructed. However, for this recipe, long soaking (for 12 hours in cool water) is best because the cashews slowly soften rather than being shocked, yielding a softer, creamier cheese.
- You can use both types of garlic. Garlic powder (more intense + fragrant). Fresh garlic (more intense and spicy)

Conclusion
Homemade vegan cheese is a healthy choice for your heart and digestive tract and aids in weight loss. You can even alter the ingredients to accommodate allergies, like celiac disease (gluten-free needed) or nut allergies.
We hope these homemade vegan cheese recipes spark your creativity and satisfy every cheesy craving the plant-based way. Making your vegan cheese is not only healthier but also rewarding and fun.
Try different flavours, share with friends, and enjoy the freedom of delicious dairy-free alternatives. Keep experimenting and discover just how tasty homemade vegan cheese can be. Happy cooking, and enjoy every bite!
I trust you enjoyed this article about the 8 Delicious Homemade Vegan Cheese Recipes For Your Kids. Please stay tuned for more blog posts to come shortly. Take care!
JeannetteZ
>>> Please click here to read my Vegan Travel Guides To World Destinations <<<
>>> Do You Love Cheese? Do You Want To Learn How To Make Your Own Delicious, Healthy AND 100% Vegan Cheese For You And Your Family? Click here for My #1 Recommendation <<<
Your Opinion Is Important To Me
Do you have thoughts, ideas, or questions? I would love to hear from you. Please leave me your questions, experiences, and remarks about this article on the 8 Delicious Homemade Vegan Cheese Recipes For Your Kids in the comments section below. You can also email me at Jeannette@LivingTheVeganLifestyle.org.
Disclosure
This post may contain affiliate links. I earn from qualifying purchases as an Amazon Associate and through other affiliate programs. Please read my full disclosure.
Here are links to some of my favourite articles:
9 Delicious Vegan Recipes Using Lemon Balm
5 Delicious Vegan Recipes Using Cilantro
7 Healthy Vegan Recipes Using Sage For Your Kids
6 Most Popular Vegan Recipes Using Chives
6 Delicious Vegan Recipes Using Rosemary